
Final Fantasy 13 follows the main characters after they were branded by the man-made gods known as fal’Cie. Once branded, they must complete their focus, a mission that will turn them into a monster if they fail to do so. Final Fantasy 13 is often regarded as a black sheep in the franchise, with many fans and critics criticizing its linearity and feeling that it represents a step back in the series as a whole.
Final Fantasy 13 Main Characters
©Image: Square Enix
- Lightning
- Snow Villiers
- Sazh Katzroy
- Hope Estheim
- Oerba Dia Vanille
- Oerba Yun Fang
Other Titles In The Series
©Image: Square Enix
- Final Fantasy (1987)
- Final Fantasy II (1988)
- Final Fantasy III (1990)
- Final Fantasy IV (1991)
- Final Fantasy V (1992)
- Final Fantasy VI (1994)
- Final Fantasy VII (1997)
- Final Fantasy VIII (1999)
- Final Fantasy IX (2000)
- Final Fantasy X (2001)
- Final Fantasy XI (2002)
- Final Fantasy XII (2006)
- Final Fantasy XIII (2009)
- Final Fantasy XIV (2010 / 2013)
- Final Fantasy XV (2016)
- Final Fantasy XVI (2023)
Final Fantasy 13 Cheats
Easy CP
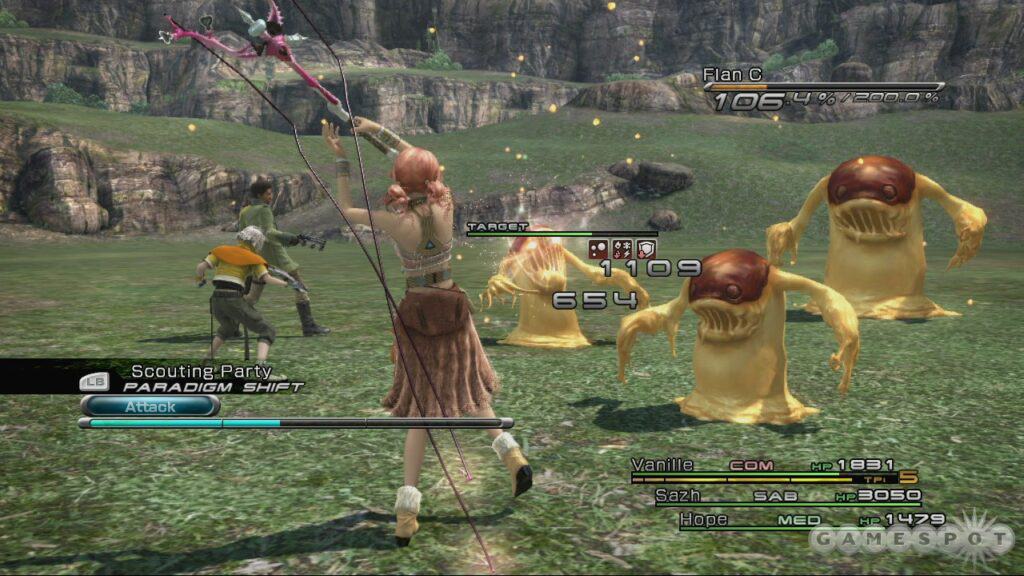
When you are at Hope’s home towards the end of Chapter 7, you will encounter an attack from groups of three PSICOM enemies. There is a save point, and a group of enemies on the left and right sides of you. Defeat one set of enemies, and then fight the next set. Once you have defeated all of them, run around the room to the other side, and the enemies will respawn. You can repeat this as many times as desired and complete a battle each time in under one minute by simply using the Relentless Assault and Diversity combinations. After each battle, you will get 160 CP, as well as an item occasionally from the spoils that remain. This trick allows you to easily gain enough CP to use later on if you have already maxed out your current level, or you can max out your current level in the Crystalium system.
When you first arrive in Gran Pulse, you will be instructed to visit Vanille’s village. On the way to the village, you must go through Taejin Tower. Do the following steps to get easy CP:
- Defeat the Boss at the apex of Taejin Tower. 2. Take the elevator down to level four, and then the other elevator (the first room on the left when exiting the elevator) up to level five. 3. You will see a mission statue directly in front of the elevator (Mission 24). 4. Select the statue, and re-accept the mission. The target will spawn in the same room. 5. Kill the group of three that spawn to get 6,000 CP and an item that sells for 6,000 Gil . 6. Go back to the statue, re-accept the mission again, and complete it. Repeat these steps as many times as desired.
You can use the following tactic to kill them in approximately 34 seconds with tier two weapons. Have your party consist of Snow, Vanille (use her tier two Marlboros Wand), and Lightning—tactics: Default – Ravager, Ravager, Ravager – Other – Commando, Saboteur, Commando. Start with the default Ravager x3 on the primary target (located in the middle; it should be auto-targeted) until he is staggering. Then, switch to your other tactic, and keep auto-attacking the same enemy. With help from Vanille (saboteur), he will die in a few combos while your other commando is already killing one of the side enemies. Keep attacking until he is dead. To make this easier, equip the auto-haste “Sprint Shoes” gear.
During the assault on the Estheim house, run around the circular hallway instead of taking the red circle out of the room. The soldiers are easy to defeat, and you can get anywhere from 120 to 200 CP per battle, as well as an incentive chip that you can sell if desired. An easy way to do this is to attack the soldiers at the window, and instead of turning around and going straight for the soldiers behind you, go around the hall and attack. Once you make it back, the soldiers at the window will have respawned.
When you enter the hall while on the Palamecia and the alarms go off (there is a safe point against the wall), defeat all the enemies. Instead of making the right turn, continue straight. You will eventually end up back at the entrance to the ship. Kill all the enemies located there, then turn back. The enemies in the hall will have respawned. Most battles will get you at least two Credit Chips or one Incentive Chip, and a good amount of CP. Repeat this as many times as desired.
Use the following trick to earn approximately 6,600 CP in just two minutes. Two Behemoth-like enemies are fighting each other at Gran Pulse. Once you encounter them, a preemptive attack will always happen. Use the following Optima set-up: Attacker/Enhancer/Enhancer. Wait until you get Haste and Fire elemental offense. Then, switch to Attacker/Blaster/Blaster. Kill the purple creature to make the white one easier to defeat. Go back near the save point to have them respawn.
Easy CP, Gil, and experience items
Use the following trick to get easy CP, Gil, and experience items. Once you are back inside the airship and get to the area shown below, save at the first save point. Then, run along the route until you reach save point 2. Save there, then run back. Repeat this multiple times to get Credit Chips, Incentive Chips, and Perfect Conductors (the highest experience item at that point in the game). You will also get approximately 3,000 to 5,000 CP for each run through.
_ / SP2| | / | ^ # | |_ ^ | | | | | | ——SP1 | | | |_|
Sprint Shoes accessory
You can either find the Sprint Shoes or make them. One method of making them is using a Tetradic Tiara. Follow the order below exactly. This method works best if you have the accessory that increases the likelihood of a drop after a battle. Make sure you upgrade it to the top tier as well.
- Buy Four Iron Bangles (500 Gil each). Ensure there are no Tetradic Tiaras in your inventory. 3. Keep doing Mission 7 (Disc 3, Gran Pulse) until you get a Tetradic Tiara (rare drop). 4. Save the game. 5. Break down all four Iron-Bangles. 6 . Upgrade Tetradic Tiara level 1 to Tetradic Tiara? (only one level until the star). 7. Break down Tetra Tiara ?. 8. Repeat these steps as many times as desired.
The result should be one raw material that sells for 12,500 Gil, three Talismans, and one pair of Sprint Shoes. The exact process works if you obtain the Tetradic Crown instead of the Tiara; however, instead of breaking down four Iron-Bangles, break down only three. Additionally, instead of receiving the Sprint Shoes, you will receive Hermes Shoes. If you upgrade this to the star level (just one level), then upgrade it with the correct crystal/stone/etc, it will turn into the Sprint Shoes. Alternately, you can upgrade the Tetradic Crown to star level, then ,using the correct stone/crystal (Mnir Stone or something similar), you can turn it into Tetradic Tiara, and then perform the process above.
Extra ATB
Set up two identical Paradigms and place them close to each other at the top of the menu. You do not have to use the same ones, but do so if it is the best attack. You may want to try this with your battle speed set to slow until you become accustomed to the process. During turn 1, let your ATB charge. For example, if you have four attacks, during the third attack, display the “Paradigm” menu, and highlight the next Paradigm. Once you see your fourth attack on screen or guess the timing for turn 2, use the extra ATB. After using this extra ATB during turn 3, charge your ATB so you can use it again. You must charge a turn to get an extra ATB. However, you cannot use an extra ATB to get another extra one. Note: You can charge the ATB halfway to get an extra one. For example:
Turn 1: Attack, then switch Paradigm at end of attack.Turn 2: Extra ATB attacks. Turn 3: Repeat turn 1.
Determining capped weapon experience
Use the following equation to determine how much experience is required to get any weapon capped at its current level:
n = The increase in your weapon will grow after every level obtained. For example, to progress from level 1 to level 2, you need 1,000 experience points. From level 2 to 3, you need 1,125 EXP. n = 1,125 minus 1,000, which in this case is 125. So n for this weapon would equal 125.
x = The total number of levels you will need to cap (Star) your weapon. For example, from 1 to 21 (Star) for Tier 1 weapons requires 20 levels (21-1=20).
b = The base experience your weapon contains. For example, Axis Blade at level 1 requires 1,000 experience to reach level 2. 1,000 is the base experience.
(xn-n)(x/2)+bx = Total experience necessary to cap a weapon. An easier way to understand this equation is x times n minus n. Then, multiply that value by x divided by 2. Then, add b times x.
Changing options before the Boss battle
Just as the cutscene before a Boss battle ends, press [Menu]. The menu screen will appear, allowing you to reconfigure paradigms, weapons, and other settings.
Final Fantasy 4 reference
The town of Palompolum is a reference to the twin magicians, Palom and Porom, from Final Fantasy 4. When correctly translated into the Western alphabet from Japanese kanji, Porom should be spelled “Polom” or “Polum”. The town’s name is simply the combination of the twins’ names into one word.
Steam achievements
Complete the indicated task to unlock the corresponding achievement.
To view your achievements and stats in Steam, select “Community” > “My Profile” > “View All My Games”, then choose the game and select “View Stats.”
- Adamant Will – Defeated a heavyweight of the lowerworld wilds.
- Commando’s Seal – Mastered the Commando role.
- Dorgann’s Trophy – Completed all high-level Cie’th Stone missions.
- Exorcist – Triumphed over undying lowerworld souls in seven fierce battles.
- Floraphobe – Toppled a green terror and cut an oversized succulent down to size.
- Galuf’s Grail – Completed all Cie’th Stone missions.
- Gysahl Wreath – Discovered buried treasure with a little help from a chocobo.
- Instrument of Change – Witnessed the dawn of a new crystal legend.
- Instrument of Dissent – Survived the Purge to confront a greater peril.
- Instrument of Faith – Defied destiny’s charge and embarked on a different path.
- Instrument of Fate – Took the first steps toward challenging an unjust fate.
- Instrument of Flight – Slipped through the net and lived to fight another day.
- Instrument of Hope – Traveled to the world below, seeking a way to alter fate.
- Instrument of Rebellion – Made plans to infiltrate enemy-occupied territory.
- Instrument of Shame – Carried the burden of guilt to the end of the line.
- Instrument of Survival – Evaded pursuers, though memories of the past still gave chase.
- Instrument of Tragedy – Strode into danger’s den and paid the consequences.
- Instrument of Truth – Recognized the true threat to the world’s future.
- Instrument of Vengeance – Resolved to be more than a victim of circumstance.
- Instrument of Wrath – Took the fight to the enemy’s door.
- Kelger’s Cup – Completed all low-level Cie’th Stone missions.
- L’Cie Paragon – Earned a 5-star rating for all Cie’th Stone missions.
- Limit Breaker – Dealt over 100,000 damage with a single attack.
- Loremaster – Discerned the full attributes of 100 enemies.
- Master’s Seal – Fully developed all characters.
- Medic’s Seal – Mastered the Medic role.
- Natural Selector – Passed Titan’s trials.
- Pulsian Pioneer – Took over 10,000 steps on the lowerworld surface.
- Ravager’s Seal – Mastered the Ravager role.
- Saboteur’s Seal – Mastered the Saboteur role.
- Sentinel’s Seal – Mastered the Sentinel role.
- Superstar – Earned a 5-star rating in the battle to determine the world’s fate.
- Synergist’s Seal – Mastered the Synergist role.
- Treasure Hunter – Held every weapon and accessory.
- Xezat’s Chalice – Completed all mid-level Cie’th Stone missions.
Bonus themes
Get the indicated trophy to unlock the corresponding PlayStation 3 character theme:
Fang: Get the “Treasure Hunter” trophy. Hope: Get the “Instrument of Change” trophy. Lightning: Get the “Superstar” trophy. Sazh: Get the “Lore Master” trophy. Serah: Get the “Ultimate Hero” trophy. Snow: Get the “L’Cie Paragon” trophy. Vanille: Get the “Instrument of Faith” trophy.
Trophies
Complete the indicated task to unlock the corresponding trophy:
Standard Trophies
- Commando’s Seal (Bronze) – Mastered the Commando role.
- Ravager’s Seal (Bronze) – Mastered the Ravager role.
- Sentinel’s Seal (Bronze) – Mastered the Sentinel role.
- Saboteur’s Seal (Bronze) – Mastered the Saboteur role.
- Synergist’s Seal (Bronze) – Mastered the Synergist role.
- Medic’s Seal (Bronze) – Mastered the Medic role.
- Limit Breaker (Silver) – Dealt over 100,000 damage with a single attack.
- Adamant Will (Silver) – Felled a heavyweight of the lowerworld wilds.
- Master’s Seal (Silver) – Fully developed all characters.
- Treasure Hunter (Gold) – Held every weapon and accessory.
- Loremaster (Gold) – Discerned the full attributes of 100 enemies.
Secret Trophies (25 total)
- Instrument of Fate (Bronze) – Took the first steps toward challenging an unjust fate.
- Instrument of Dissent (Bronze) – Survived the Purge to confront a greater peril.
- Instrument of Tragedy (Bronze) – Strode into danger’s den and paid the consequences.
- Instrument of Flight (Bronze) – Slipped through the net and lived to fight another day.
- Instrument of Vengeance (Bronze) – Resolved to be more than a victim of circumstance.
- Instrument of Survival (Bronze) – Evaded pursuers, though memories of the past still gave chase.
- Instrument of Rebellion (Bronze) – Made plans to infiltrate enemy-occupied territory.
- Instrument of Shame (Bronze) – Carried the burden of guilt to the end of the line.
- Instrument of Wrath (Bronze) – Took the fight to the enemy’s door.
- Instrument of Truth (Bronze) – Recognized the true threat to the world’s future.
- Instrument of Hope (Bronze) – Traveled to the world below, seeking a way to alter fate.
- Pulsian Pioneer (Bronze) – Took over 10,000 steps on the lowerworld surface.
- Gysahl Wreath (Bronze) – Discovered buried treasure with a little help from a chocobo.
- Kelger’s Cup (Bronze) – Completed all low-level Cie’th Stone missions.
- Xezat’s Chalice (Bronze) – Completed all mid-level Cie’th Stone missions.
- Instrument of Faith (Silver) – Defied destiny’s charge and embarked on a different path.
- Exorcist (Silver) – Triumphed over undying lowerworld souls in seven fierce battles.
- Floraphobe (Silver) – Toppled a green terror and cut an oversized succulent down to size.
- Natural Selector (Silver) – Passed Titan’s trials.
- Dorgann’s Trophy (Silver) – Completed all high-level Cie’th Stone missions.
- Galuf’s Grail (Silver) – Completed all Cie’th Stone missions.
- Instrument of Change (Gold) – Witnessed the dawn of a new crystal legend.
- L’Cie Paragon (Gold) – Earned a 5-star ranking for all Cie’th Stone missions.
- Superstar (Gold) – Earned a 5-star ranking in the battle to determine the world’s fate.
- Ultimate Hero (Platinum) – Acquired all trophies.